
IoT Penetration Testing is one of our favorite types of testing here at Brackish Security. This will be the first of a multi-part blog series on embedded device security (the “Internet of Things” or IoT). Our goal is to show how the Brackish security team approaches an IoT pentest, including detailed methodologies and examples.
IoT hacking has a physical aspect to it that other target types lack. This can be a significant departure from “traditional” pentesting. To hack a web app you don’t need to take apart the physical server it’s hosted on and analyze the components inside. However, taking the device apart is often the first step in an IoT pentest.
For this reason, before we dive into specific techniques and walkthroughs we must discuss the additional hardware toolset requirements for this type of testing.
The list below is not all-inclusive, and most devices will not require use of every tool. However, these tools will suffice to deconstruct and analyze the most common technologies found in use by IoT devices today.
IoT Penetration Testing – The Basics
Small screwdrivers, pliers, blades etc.
Manufacturers typically don’t want end users taking their devices apart. They’ll use obscure screw head shapes, place the screw in a difficult spot such as a deep hole in the case, cover screws in hardened epoxy, and use any other means they can think of to make our job more difficult.
In addition to removing screws, prying or cutting may be required. For this we need basic scissors, pliers, blades etc.
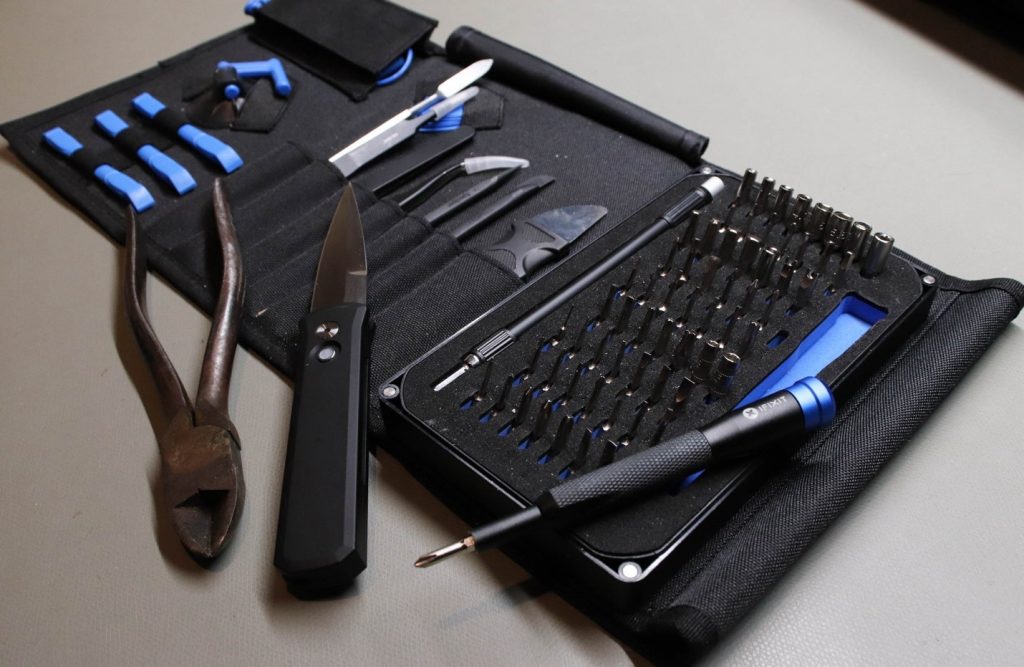
There are many options out there, but to get started, we’d recommend the iFixit Pro Tech Toolkit or the STREBITO Electronics Set
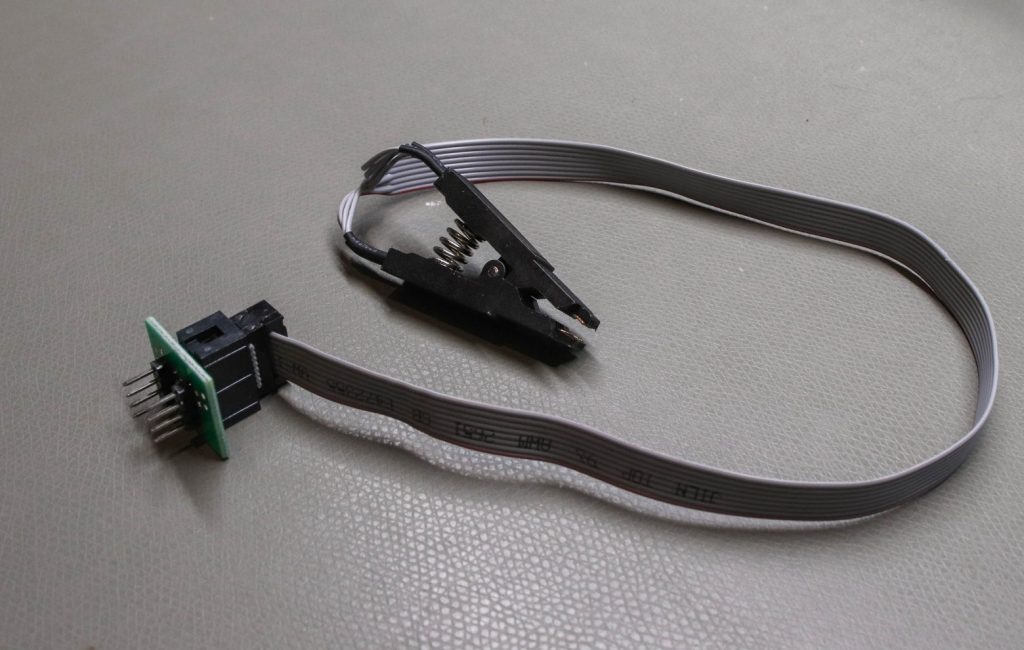
SOIC clips
During IoT Penetration Testing, we may need to interact with chips on the PCB directly. These pins are often very small and close together. An SOIC clip (“small outline integrated circuit”) like the ones shown here can make this job significantly easier:
Alligator clips
If pins are not too close together, it may be possible to clip to them individually with an alligator clip:
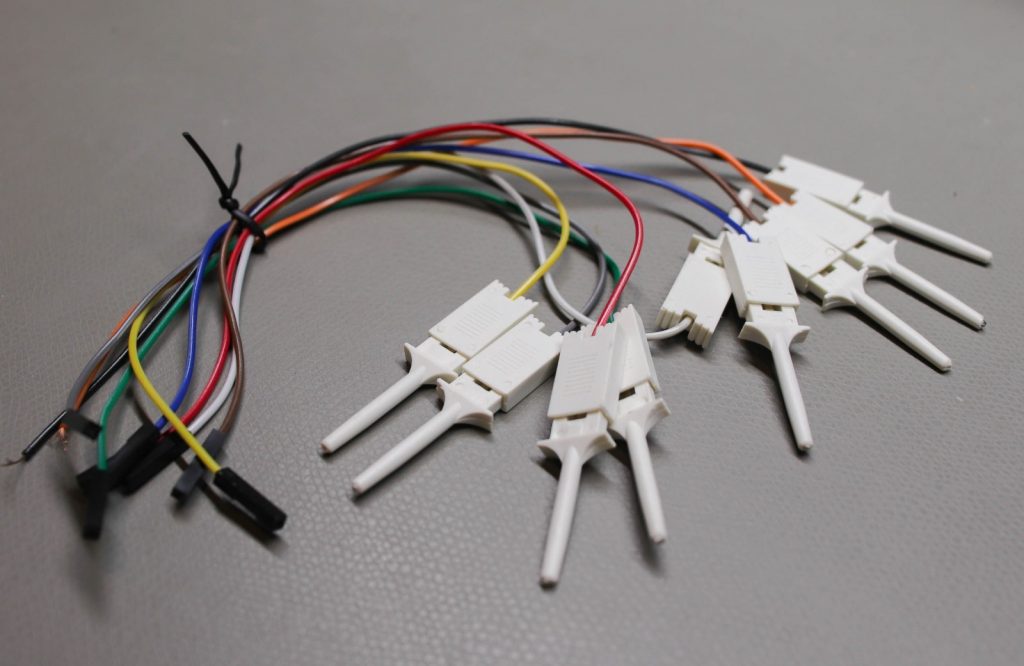
Here is a good set to get started – Clips.
Pin headers
Some circuit boards (PCBs) have holes to fit pin headers, rather than including pin headers on the board. We can solder our own headers onto these holes when needed. Here are some examples.

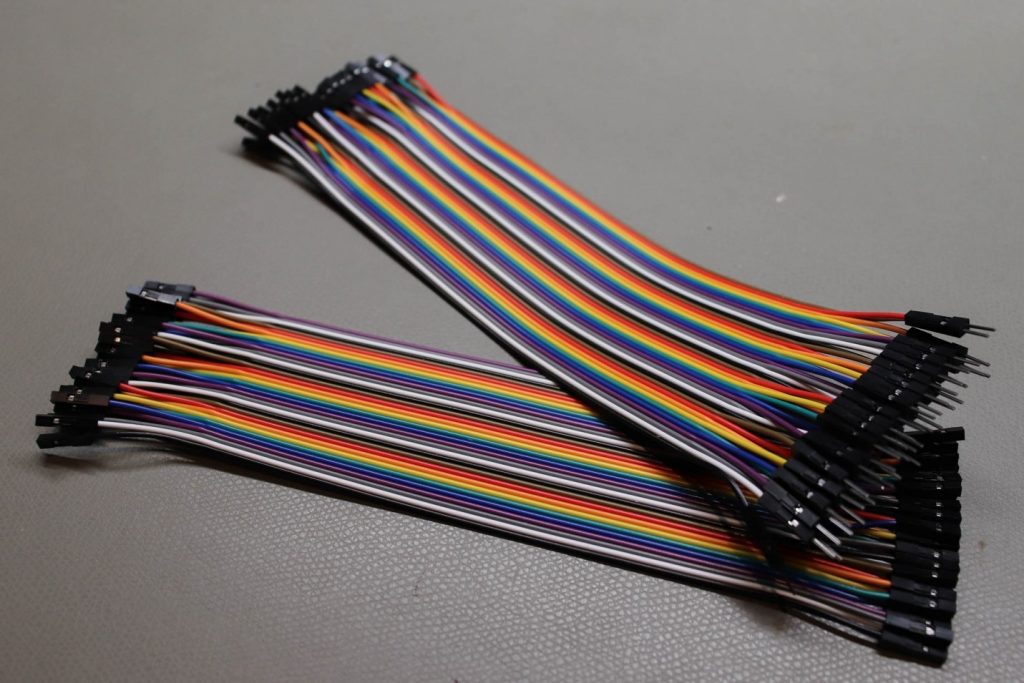
Jumper wires
To connect pins on the PCB to other tools and components we’ll need jumper wire. It’s always useful to have an array of extra jumper wire available in various lengths:
Soldering iron
Soldering is a necessary skill for IoT Penetration Testing. You will need an iron, solder, and soldering flux. Most soldering irons will suffice, but spending a little extra here can be worth it for temperature adjustability and convenience:
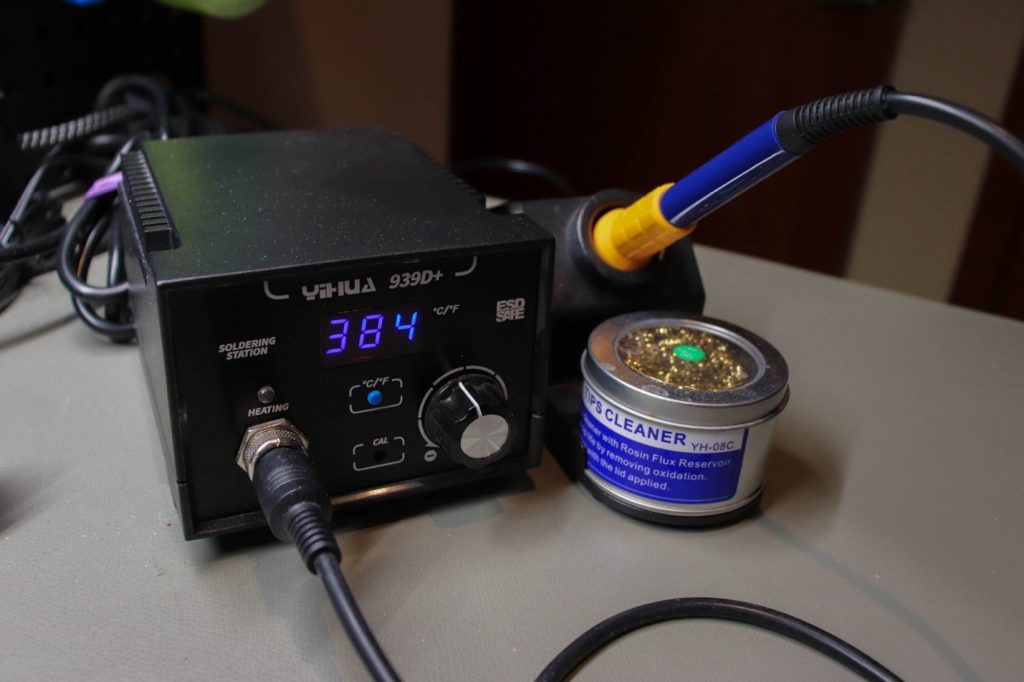
Again there are a lot of options out there for soldering irons. Here are a couple options at slightly different price points:
Signal Analysis
Multimeter
A multimeter is integral to IoT Penetration Testing. With this device a tester can measure electrical values related to voltage, resistance, and current. This information is often an early step in identifying the type and purpose of various pins on a PCB. After gaining access to a device’s PCB, a multimeter is often the first tool used by a security tester.
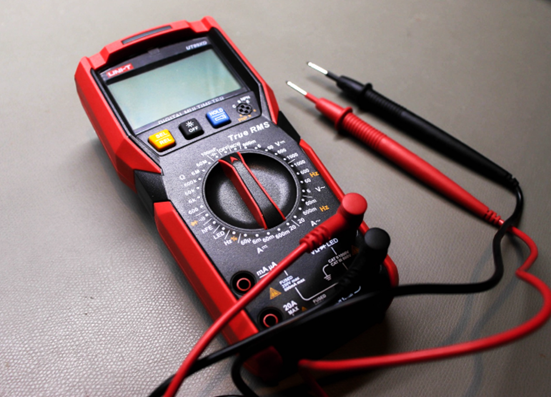
Along with a soldering iron, a multimeter is integral to IoT penetration testing. Here are a couple of options to consider:
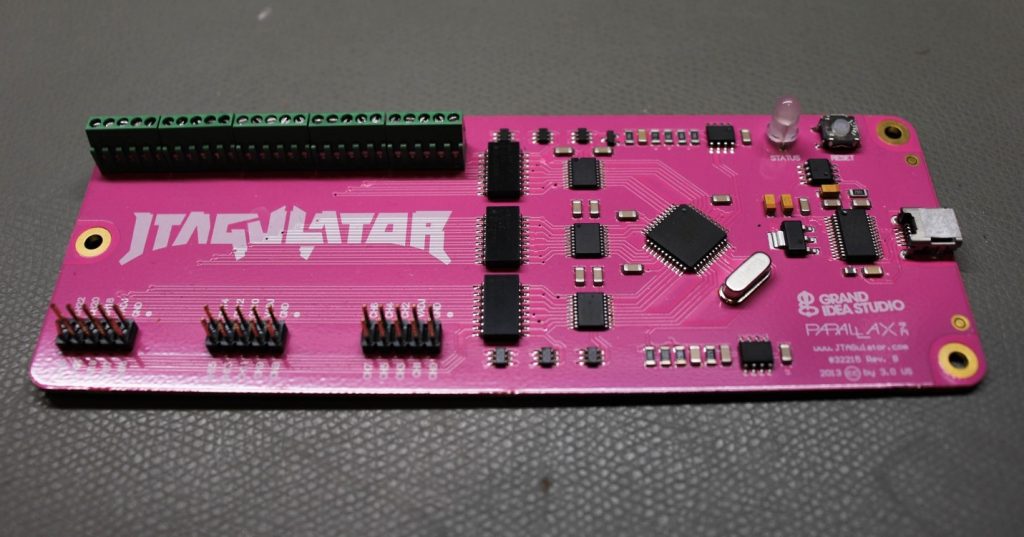
JTAGulator
The JTAGulator can assist with identifying a debug interface as JTAG or UART during IoT Penetration Testing. It will also show the correct pin order necessary to connect. This makes interacting with JTAG significantly easier as the pin order is often not marked on the PCB.
Multitools
Tools in this category facilitate direct interaction with chips on the PCB. They support a variety of protocols commonly used on embedded devices, allowing us to read and/or write data on a target chip.
BusPirate
The BusPirate supports multiple protocols including UART, JTAG, I2C and SPI and others listed here. This tool is a “swiss army knife” for IoT security testing.

Attify Badge
Like the Bus Pirate, the Attify Badge supports multiple protocols including UART, JTAG, I2C and SPI. It is simpler to use than the Bus Pirate, but at the cost of some features and protocol support.
RF/SDR
IoT devices transmit and receive data using a variety of methods and protocols, including radio. These devices use software to perform modulation, demodulation, filtering, and other radio functions (thus “software-defined radio”).
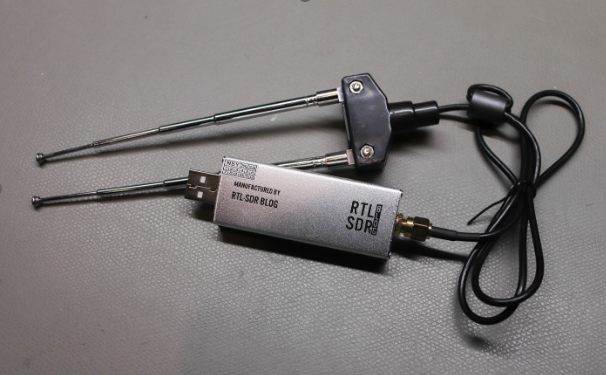
RTL-SDR
The RTL-SDR is the ultimate budget SDR tool. It can only receive signals and can’t transmit, but it supports a wide frequency range which includes the most common frequencies used by IoT devices. For around $40, it’s a great way to get started with RF/SDR security.
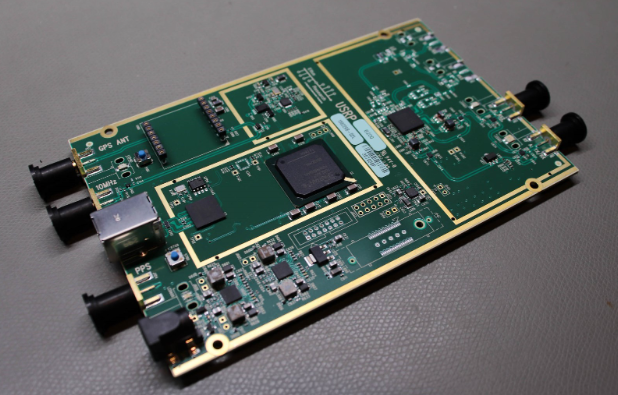
USRP
The USRP (Universal Software Radio Peripheral) has a significantly larger feature set and broader supported frequency range vs. the RTL-SDR or similar tools. This comes at a significant price increase. The USRP can transmit and receive simultaneously (full duplex), and supports frequencies from 70MHz to 6Ghz.
BLE (Bluetooth)
Bluetooth (BLE or “Bluetooth Low Energy”) is a very common technology in IoT devices due to its low cost, high bandwidth and broad adoption into smartphones and other consumer devices.
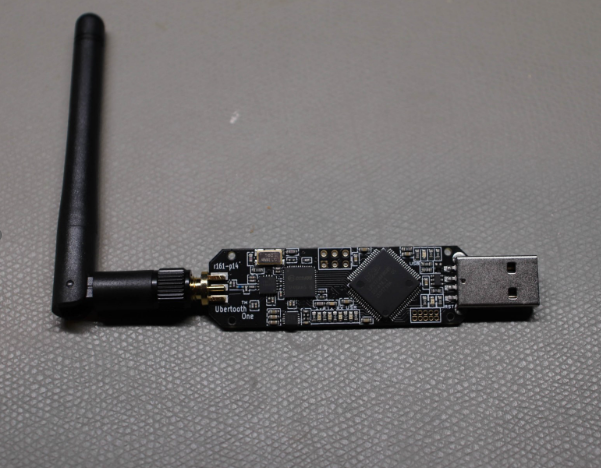
Ubertooth One
The Ubertooth One is an open-source 2.4Ghz receiver and transmitter. It can be used to monitor and analyze BLE connections at a low cost compared to other tools. Unfortunately, this tool is no longer being manufactured, but can still be purchased.
Thanks for reading the first post in our IoT Penetration Testing series. In future posts we’ll dive into the jobs and scenarios these tools are designed for. We’ll demonstrate their use and show the kind of analysis they enable. IoT hacking has a higher barrier to entry due to these equipment requirements, but the rewards are satisfying and worthwhile. As with our series on Mobile Application Penetration Testing, stay tuned for more articles!
Written By: Jeff Barbi