

Welcome back to our series on Mobile Application Penetration Testing! In this post we will discuss Android Studio and Android Debug Bridge. If you’re new to this, you might want to go read from the beginning or check out the previous post. But not only will we discuss Android Studio and Android Debug Bridge, we will also install them.
Android Studio is an Integrated Development Environment (IDE) designed specifically for Android development. If you’ve used any JetBrains IDEs, you’ll instantly recognize Android Studio. Why are we installing Android Studio? Here is why:
Understanding App Architecture:
By having access to Android Studio, a penetration tester can better understand how Android apps are structured and developed. This knowledge is crucial when assessing potential vulnerabilities, especially those related to the app’s design or implementation.
App Decompilation and Code Analysis:
Android Studio can be used to decompile APK files, allowing the tester to inspect the source code and resources of an application. This can reveal insecure coding practices, hardcoded sensitive data, or other security flaws.
Debugging and Dynamic Analysis:
Android Studio includes powerful debugging tools. A penetration tester can use these tools to perform dynamic analysis of applications, examining their behavior at runtime to identify security issues that static analysis might miss.
Modifying and Rebuilding Apps:
Sometimes it’s necessary to modify an app to understand how it reacts to certain changes or to simulate attacks. Android Studio allows testers to recompile modified apps, facilitating this kind of testing.
Emulator for Testing Environments:
Android Studio’s emulator can simulate various devices and Android versions, which is vital for testing apps in different environments. This helps in identifying vulnerabilities that might be specific to certain versions or configurations.
Integration with Other Tools:
Android Studio allows for integration with other tools commonly used in penetration testing, such as proxy tools for intercepting and analyzing network traffic from the app.
Developing Proof-of-Concepts:
For demonstrating vulnerabilities, a penetration tester might need to develop proof-of-concept exploits or patches. Android Studio provides the necessary environment to write and test these codes.
Staying Updated with Android Ecosystem:
Regular updates to Android Studio include the latest features and security enhancements of the Android platform. Familiarity with these updates helps a tester in identifying new attack vectors and understanding security measures in the latest Android versions.
Small Rant
I’m a firm believer that to be the best web application hacker you can be, you should experiment with building applications of all sorts. These apps don’t have to be some ground breaking one-of-a-kind thing, they are just going to be ways to get you introduced to new frameworks and familiar with various tooling and languages. Simply follow tutorials to build some stuff. However, at the end of the day, having development skills will be of immense help in your offsec career. The same goes for Mobile Application Penetration Testing – possibly even more than with web applications. Thankfully the development environments for mobile applications are fairly mature, robust, and available for all platforms.
Android Studio Installation
Android Studio is available for installation on Windows, Linux, and Mac. Personally, I’d suggest using Linux or Mac, since other tooling you need as a penetration tester will likely only work on those platforms. So go ahead and follow the official directions at that link and come back here when you’re done.
At the end of the day, we are installing Android Studio for many reasons, but at this point, it will mainly be because we want to use Android Debug Bridge (adb). To use adb with a device connected over USB, we must enable USB debugging in the device settings. Follow the directions at that link to enable debugging.
Once everything is all setup, run the following command to verify you device is connected and debugging is enabled:
adb devicesYou may need to add the android_sdk/platform-tools/ to your path, or use the full path the the adb binary in the command above. The output should show your device:

Fire it Up
I know I was talking about using adb to connect to your physical device, but you can also create virtual devices. Please fire up Android Studio, and then watch this short video showing how to create a virtual device.
When creating the device, you may need to download the operating system image, which can take some time. Do that by clicking on the download icon next to the image name. In this video, I had already downloaded the image to speed things up.
Mirroring a Physical Device on Screen
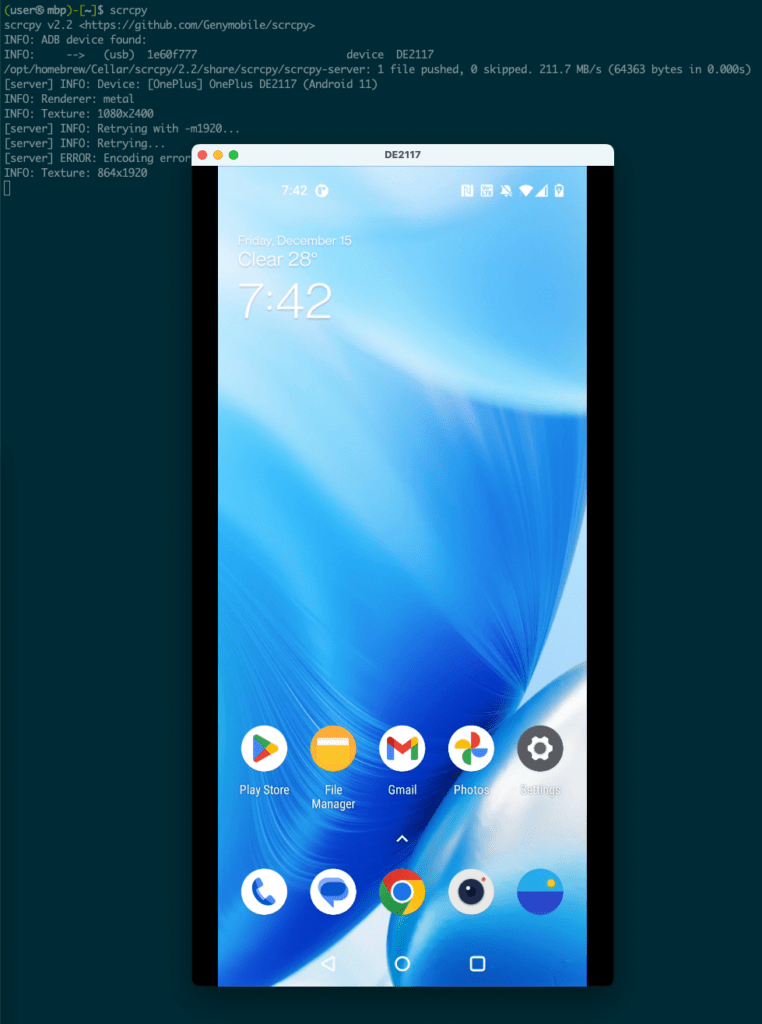
So now you have a rooted physical device and can also create a virtual device. Wouldn’t it be nice if you could project the screen of a physical device onto a larger monitor where you can use a mouse and keyboard to do things? Yes, it would be. This is where scrcpy comes into play. Go check it out and install it on you desktop or laptop – https://github.com/Genymobile/scrcpy.
Then, just open a terminal and run scrcpy and voila!
That’s All Folks
That’s all we are going to cover today. Now you should have Android Studio, but most importantly ADB installed. You should also be able to mirror your physical Android device onto a “real” computer. Stay tuned for more. We haven’t even got to the good stuff yet.